Cupcake
Tutorial 9

 Tutorial 9 - Teleporting to Syrnia
You are now ready to join the world of Syrnia.
Read the game Manual for more information, and use Help chat to ask for any other help.
It's now up to you to decide how your Syrnian life will be lived.
- Want to become a pirate and send pirate invasions to kill other Syrnians?
- Want to become a famous trader, owning your own shop on every island?
- Want to become the very best in one or more skills?
- Want to show off your rare artifacts?
- Want to kill other players in the Outlands?
- Want to spend nights getting drunk at the Elven casino?
- Want to meet new friends, and join a Clan?
In Syrnia, you can be anything you want to be. Your imagination is your only limit. Just be sure to follow the Rules!
When you are ready to learn from your final Master, you can talk to the Magic Master.
Magic Master: Greetings, mortal.
Permeating all of Syrnia, there exists a powerful Magic.
We have learned to tap into this source of power and use it for our gain.
We enchant out tools with strengths far beyond that of our physical ability.
We create orbs to transport ourselves across vast distances in the blink of an eye.
I will not reveal all of the secrets of Magic to you, but I can tell you of one who can.
Visit the witch, Bluebell. She will help you begin to understand Magic.
I have one last Teleport Orb left for you.
Farewell, traveler.
Touch the Sanfew Teleport Orb when you are ready.
Tutorial 8
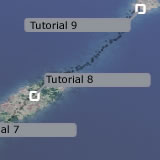
Tutorial 8 - How to Learn More.
(Guide)Master: Welcome to Syrnia, [Player Name]!
You have arrived at the second-to-last location. This Tutorial has come to an end.
If you want to learn more about any specific game skills, be sure to check the Manual.
There's a link to the manual at the bottom of the page, next to the chat bar.
If the manual doesn't cover it, Help chat will. Syrnia is full of helpful players who can answer any specific question you might have.
We hope this tutorial was useful to you and saved you a lot of time trying to figure things out on your own.
You are no longer just "[Player Name]". You are now a Syrnian!
Proceed to the final tutorial.
Tutorial 7
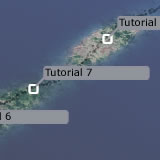
 Tutorial 7 - Fighting for Fortune and Fame.
Valera Knight: Hello, [Player Name].
You are probably eager to fight some monsters! However, we will not allow you to fight on Tutorial Island since you could die and lose all your items.
If you like, you could begin fighting in Syrnia right away, upon completion of the tutorial. If you want to begin Combat, be sure to remember these things:
- Be prepared. Make sure you have cooked or grown food with you to heal yourself upon taking damage.
- Make sure you have a good set of armour, along with a weapon (and equip them!).
- To start fighting, go to Valera and fight the Rats at the training grounds.
- Construct or but a house, and then deposit your valuables in your house so you don't lose them upon an untimely death.
- Your gp (gold points) are not lost upon death, but storing them in your house can help protect against potential thieves.
You cannot fight other players on the main islands. You can only fight them in "The Outlands", which is a huge island dedicated to Player vs. Player (PvP) combat.
You may now continue forth to Tutorial 8, new Syrnian.
Tutorial 6

 Tutorial 6 - Cooking your own Dinner
Cooking Master: Hello there, [Player Name].
Today, I will be teaching you how to cook your inedible raw fish into something quite delicious.
With your Tinderbox and Wood, you are ready to start a fire and get to cooking!
- To begin, equip your Tinderbox from your Inventory.
- Click on "Cook Shrimps" from the City Menu.
Go ahead and try to cook your Shrimps. After you have done so, click on "Tutorial 6" from the City Menu to come back and talk with me.
Cooking Master: Nice going, [Player Name]!
You managed to successfully cook (or burn...) some Shrimp!
There are many types of things to cook within the world of Syrnia.
There are also many different tools that can aid your endeavors in Cooking, such as Cauldrons and special tinderboxes.
If you ever find yourself stuck or needing help, you can try reading the Manual for some very helpful information on everything Syrnia has to offer. There is a white Manual link located near the bottom of your Chatbox.
It seems you have learned all that I can teach you about the Cooking skill.
Farewell, [Player Name]. The next Master eagerly awaits your arrival at Tutorial 7.
Tutorial 5
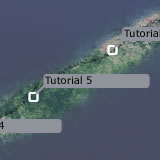
 Tutorial 5 - Woodcutting Like a Lumberjack
Woodcutting Master: G'day, [Player Name]!
Its time for you to learn how to chop down trees like a lumberjack!
I am sure you are getting the hang of things by now, but let's just go ahead and go over the basics one more time.
1. First, equip your Bronze Hatchet by clicking on it in your Inventory.
2. Next, be sure to click on "Woodcut" under the City Menu.
After you have chopped down a tree, you will get 1 Wood.
Once this is accomplished, come back and speak with me!
Woodcutting Master: Great going, [Player Name]!
You managed to chop down an entire tree, and you have some Wood.
You might find treasure other than just plain ol' Wood while training Woodcutting.
You can sometimes find seeds in the trees, which you can plant and grow to train your Farming level.
You might also stumble upon some Locked Chests. They are rare and worth quite a bit.
Well, these are the basics of the Woodcutting skill.
If you are ready to move on to the next Master, I wish you the very best in your travels!
Tutorial 4
 Tutorial 4 - Fishing in the Streams and Seas of Syrnia
Fishing Master: Ahoy there, [Player Name]!
Today, you will be learning about the art of Fishing.
Fishing is one of the deepest skills Syrnia has to offer.
There are many different tools and boats that can be used to fish, from a plethora of locations.
Fishing is also very profitable, as you can always sell your raw fish to other players who are training their Cooking skill.
Whenever you are ready to catch your first Shrimp, just equip your Net by clicking on it in your inventory.
Once you have your Net equipped, then you are ready to start fishing. Just click on the "Fish" link under the City Menu.
Fishing Master: Congratulations! You caught your first Shrimp!
When you're a newbie, early fish are pretty small and don't give much experience, but that will change with a little hard work and dedication to the skill.
As your levels grow, you will be able to catch even larger fish that heal you for more hitpoints when cooked.
Once in a while, you might even fish up a bit of sunken treasure!
As the saying goes: Give a man a fish, and you feed him for a day. Teach a man to fish, and you feed him for a lifetime.
It appears that is exactly what I have done! When you are ready, you can click on the map to move to the next Tutorial. The next Master awaits.
Tutorial 3
 Tutorial 3 - Smelting Ores and Smithing Equipment
Smithing Master: Welcome, [Player Name]!
Today, I will teach you how to smelt Bronze bars, and how to smith them into a variety of items.
After you create your first weapon, I will send you off to the next Master.
1. Make sure you have both Tin and Copper ore in your Inventory.
2. If you have both ores, you can click on the "Smelt Bronze Bars" option in the City Menu.
Smithing Master: Congratulations, [Player Name]! You just smelted your first Bronze bar!
Now that you have a Bronze bar in your Inventory, you can try and smith it into something useful.
If you look inside your Inventory, you should see a Bronze hammer.
You will always need to have a Hammer equipped if you want to smith items.
Just a reminder: You will NOT need to equip a tool to semlt ores into bars.
When you are ready, click on the "Smith" link inside the City Menu to open the Smithing interface.
Smithing Master: Congratulations, [Player Name]! You created your first Bronze dagger!
Remember! To smith items, you first have to gather the ores from mining, or trading with other players.
After you have the ores, you can then smelt them into bars.
Smelting ores into bars can be a great way to train the Smithing skill.
Once you have the required bars, you can use them to smith whatever equipment you desire, all depending on your Smithing level!
Sometimes, you might even get lucky and smith items that are extra durable.
This is all that I have to teach you. If you are ready, you can click on "Tutorial 4" in your Minimap to travel to the next Master.
Tutorial 2
 Tutorial 2 - Mining Ores, and Learning the Interface
Syrnia's Interface: Do you see the link "Learn about the Interface" under the City Menu, located near the top-left of your screen? Go ahead and try giving that a click.
Once you have learned about the interface, you can move on to Step 2 by speaking with the Mining Master below.
Mining Master: You kept me waiting, [Player Name]!
I am the Master of Mining. I will teach you the basics of the Mining skill, so listen up!
You can move on after mining at least 1 Tin ore, and 1 Copper ore.
Once you have completed this task, click on "Tutorial 2" in the City Menu to bring you back to this page.
1. Equip your Bronze pickaxe by clicking on it in your Inventory.
2. Click "Mine Tin ore" located in the City Menu to begin mining for Tin ore.
3. After you get 1 Tin ore, you will need to click "Mine Copper ore" and gather 1 Copper ore.
4. The ores will appear in your Inventory once you have mined them.
You can also click "Learn about the Interface" again if you want to be sure you fully understand everything.
If you do get stuck or need help, remember that you can always ask any game-related questions in Game Help Chat [5].
Please be sure to use Help Chat for game-related questions only. Once you complete the Tutorial, other chats for general conversation or trading will become available.
Mining Master: Congratulations! You have successfully mined 1 Tin ore, and 1 Copper ore. Well done!
Sometimes while mining, you might even stumble across a few precious gems!
I have taught you the basics of the Mining skill. You are now able to gather your own resources in Mining and perfect your craft.
Now that you have gathered both of the ores, you are ready to continue onward to the next Tutorial.
By clicking on "Tutorial 3" inside your Minimap, you will start moving toward the next Master. Good luck!
Tutorial 1
Tutorial 1 - Navigating the World
Speed Master: Hello [Player Name], and welcome to Syrnia!
I am the Master of Speed. To begin your adventure, you will be learning the basics of the Speed skill.
You will learn how to move around the world of Syrnia, and how to become faster at it over time.
Let's get you started by learning what Speed is all about.
Speed Master: Speed is a useful skill that requires a lot of devotion to train.
There are special items and magical enchantments that can reduce your walking timer.
If you are riding a horse, you will move much faster, but gain NO Experience.
You also won't find any flowers or items while riding a horse between locations.
Speed Master: Before I send you off on your way...
You should know that there are areas in Syrnia that can be dangerous for newer players.
There is an island dedicated to player vs. player combat, where the strongest players dominate.
On some islands, creatures will automatically attack you when you move to a new location, which is no joke!
If you ever are stuck as to what to do next, you can always use Game Help Chat [5] for any questions you may have.
Speed Master: Do you see the Minimap in the top-right corner of your screen?
To begin moving, all you must do is click on the town you want to travel to.
You can only travel to towns that are beside your current location. You can't skip towns.
When you are ready, move to the next Tutorial by clicking "Tutorial 2" on your Minimap.
That's about it for the basics of Speed! I've taught you what I know. Good luck, [Player Name]!